
Table of Contents
- Why Flat Roofs Leak: The Core Causes
- Flashing, Seams, and Penetration Failures
- Poor Drainage, Ponding, and Weather Damage
- How to Find a Flat Roof Leak
- How to Repair a Leaking Flat Roof
- Flat Roof Maintenance Checklist
- When to Call a Professional
- Frequently Asked Questions
Last Updated: October 21, 2026
Why Flat Roofs Leak: The Core Causes
Most flat roofs don’t fail all at once. They fail at one weak point, and water does the rest.
Below, we’ll show you how to trace a leak from the ceiling stain back to its source, plus the fixes that last.
Most guides get one thing wrong: they treat every leak as an emergency patch job. The real work is finding the source.
Three things make flat roofs vulnerable:
- Low slope: water drains slowly, so it sits and seeps.
- Many seams: every seam is a potential failure point.
- Penetrations: vents, pipes, and skylights interrupt the membrane.
The International Code Council’s building code resources set the standards for roof drainage and flashing, and most leaks trace back to one of those two areas.
Roof Age and Material Breakdown
Every roofing material has a limited lifespan. As a flat roof ages, its membrane dries out, turns brittle, and loses flexibility. Sun exposure and the freeze-thaw cycle common at higher elevations speed this up.
Older roofs often fail at the material level first: the surface cracks before anything else gives way. Past its expected service life, patching becomes a losing game.
Cracks, Splits, and Punctures in the Membrane
Physical damage opens the door to water ingress fast. Three culprits dominate:
- Cracks: from thermal movement and solar gain as the membrane expands and contracts.
- Splits: often along seams or where the roof flexes.
- Punctures: from foot traffic, dropped tools, or debris.
A single puncture the size of a coin can let in gallons over a season, soaking insulation and rotting decking.
Flashing, Seams, and Penetration Failures
Flashing and seams are where most flat roof leaks begin. These joints where the roof meets walls, edges, and rooftop equipment take the most stress and get the least attention.
Loose or Damaged Flashing
Flashing is the metal or membrane strip that seals roof edges and wall junctions. When it lifts, cracks, or pulls loose, water gets straight under the roofing material.
Watch for lifted felt, cracked sealant, and gaps at the roof edge. These are cheap to fix early; ignored, they let water reach the structure.
Failed Seams and Leaks Around Vents and Pipes
Seams join membrane panels, and every joint is a weak spot. Failed seams open as sealant dries and the material moves. Leaks around vents and pipes follow the same pattern: the seal cracks and water slips in.
New sealant won’t bond to dirt or old material, so the leak returns within months.
Poor Drainage, Ponding, and Weather Damage
Standing water is a flat roof’s worst enemy. When drains clog or the roof slopes wrong, water pools in low spots.
Heavy rain, snow, and snowmelt pile on the pressure, and temperature change stresses every seam. Over time, clogged drainage and ponding shorten a roof’s life and invite leaks at the weakest points.
- Blocked drains: debris traps water on the surface.
- Poor drainage: flat spots collect water instead of shedding it.
- Ponding: standing water sits for days after rain.
The NRCA roofing guidance notes that proper drainage design is central to roof longevity, and ponding is a leading cause of premature failure.
How to Find a Flat Roof Leak
Finding a flat roof leak means working backward from the water stain to the roof surface. Water travels along the deck, so the entry point is often uphill or sideways from where it drips inside, sometimes many feet along a seam, a rafter, or the top of insulation.
Here’s the safe, step-by-step process we use.
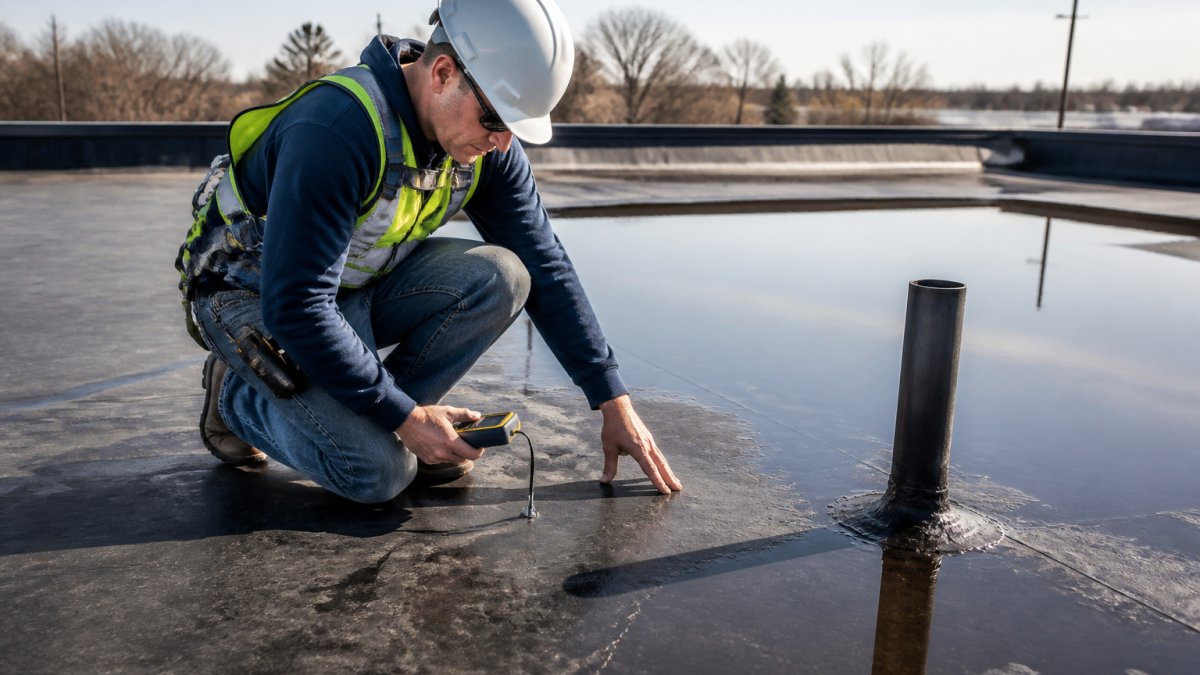
Step-by-Step: From Interior Symptoms to Roof Inspection
- Map the interior stain. Note the exact spot and check for sagging, discoloration, or mold. Interior signs point you toward the general area, not the exact entry point. A stain that grows after rain but dries between storms suggests an active path; one that stays damp continuously may mean trapped moisture or a slow, steady leak.
- Trace uphill and sideways. Follow the likely path along rafters and decking, water rarely drops straight down. Water trails, darker decking, or rusted fasteners along the route often point toward the entry point better than the stain itself.
- Inspect from inside first. Look for daylight, damp decking, or water trails in the attic or ceiling cavity. If you can see the underside of the roof deck, check for staining that runs along seams or rafters rather than pooling directly under the drip.
- Check the roof surface safely. From a stable position, look for cracks, splits, punctures, loose flashing, and failed seams. Pay attention to the uphill side of the stain and to any penetration within several feet, vents, pipes, and skylights are common entry points even when the stain is elsewhere.
- Test suspect areas. A gentle spray from a helper below, watched from inside, can confirm a leak source. Work one suspect area at a time and give the water time to travel before moving on.
Do your inspection on a dry day, then spray one suspect area at a time. Testing everything at once tells you a leak exists but not where it starts. A common pattern is to spray the area directly above the stain first, find nothing, then work uphill, the real entry point is often several feet away.
Reading the Interior Symptoms
The inside of the roof often tells you more than the top surface. A few patterns worth knowing:
- Ceiling stains that spread after rain. Active leak with a clear path. Note how long after rain the stain grows, faster growth usually means a larger or lower entry point.
- Damp insulation or a musty smell. Water is trapped in the assembly, not just passing through. This can mean the leak has been active for a while and the deck may need drying.
- Mold or discoloration at wall junctions. Water may be traveling along flashing or a wall termination before dropping inside.
Tools That Confirm a Source
Visual inspection finds the obvious defects, but confirming a source often takes a moisture meter or a careful spray test. A pin-type or non-invasive moisture meter can show wet decking or insulation where the surface looks intact, common when water has traveled along a seam. Infrared imaging can reveal temperature differences that indicate trapped moisture. Neither replaces a careful visual inspection, but they narrow the search when the stain and the surface defect don’t line up.
The stain is a symptom, not a location. The most reliable way to find a flat roof leak is to trace water uphill and sideways from where it appears indoors, then confirm the suspect area with a controlled spray test or a moisture meter.
How to Repair a Leaking Flat Roof
Repairing a leaking flat roof comes down to one choice: a temporary fix or a durable repair. Temporary patches stop the drip today; durable repairs fix the cause. The trap is treating the first as the second, a patch over a failing membrane is a delay, and sometimes it makes the damage worse by trapping moisture against the deck.
Temporary Fixes vs. Durable Repairs
| Approach | What It Does | Best For | Lifespan |
|---|---|---|---|
| Patch repair | Covers a small defect | Buying time before replacement | Weeks to months |
| Sealant touch-up | Seals a cracked joint | Small, clean seams | Months |
| Flashing repair | Reseats edge metal | Loose flashing | Years if done right |
| Membrane replacement | Replaces the failed surface | Aging or badly damaged roofs | Full service life |
Temporary fixes have their place: if a storm is coming, stop the water first. But the material matters. A patch that bonds well to EPDM may not adhere to TPO or PVC without the right primer, and a sealant designed for metal flashing can fail on a modified-bitumen surface.
A few practical rules most guides skip:
- Never trap water. If the deck or insulation is already saturated, covering the area with a non-breathable patch can push moisture sideways into dry zones. Dry the area or leave it open to drain before you seal it.
- Match the patch to the membrane. EPDM takes a peel-and-stick or contact-adhesive patch; PVC and TPO usually need heat-welded or solvent-based seam tape; built-up roofs are often patched with modified bitumen or a reinforced coating. A hardware-store patch on the wrong membrane is a short-term fix at best.
- Clean before you seal. Sealant will not bond to dirt, chalk, or old material.
Durable repairs address the actual cause: a failed seam gets cleaned and resealed, loose flashing gets reattached and re-sealed at the termination, and a worn membrane gets replaced.
A temporary patch is a stopgap, not a diagnosis. If you patch the ceiling stain and the leak returns at a different spot, the water is still traveling, the entry point was never fixed.
When a Patch Is the Wrong Call
Some conditions make a temporary fix a bad idea regardless of weather:
- Sagging deck or soft spots. Water has already reached the structure. A surface patch hides the problem while rot spreads.
- Mold or musty odor indoors. Moisture has been trapped long enough to support growth. The repair needs to include drying and possibly insulation replacement, not just a membrane patch.
- A leak that returns after a prior repair. The original diagnosis was wrong or the repair was incompatible with the membrane. Repeating the same patch will repeat the failure.
If any of those apply, the roof needs a durable repair or replacement; a temporary patch should only limit damage until that work can be scheduled.
Flat Roof Maintenance Checklist
A flat roof maintenance checklist turns reactive patching into prevention. Most leaks we see were preventable with routine care.
- Clear drains and gutters of debris each season
- Remove standing water and check for ponding after storms
- Inspect seams and flashing twice a year
The single best defense against flat roof leaks is a clean, clear drainage system. Water that drains fast can’t pond, and water that can’t pond can’t find its way inside.
When to Call a Professional
Some leaks are a quick fix. Others need a trained eye and the right materials. Call a professional when:
- Water is pooling and won’t drain
- The ceiling sags or shows mold
- The leak returns after a repair
Safety limits matter. Never walk a wet, steep, or damaged roof. A fall risk isn’t worth a look. For anything beyond a visual check from a stable spot, bring in help.
United Roofing of Colorado installs Duro-Last roofing systems, and our certified installers handle both diagnosis and durable repairs. We’re locally owned, and our team brings over 30 years of combined experience to every job.
Frequently Asked Questions
Can a flat roof leak without visible damage?
Yes. Water often travels along the membrane or insulation before it shows up inside, so the stain on your ceiling may be far from the actual entry point. Small cracks, failed seams, and cracked sealant around penetrations can let water in without any obvious surface damage. That is why a proper flat roof inspection checks seams, flashing, and drains, not just the spot above the stain.
What can you put on a flat roof to stop it from leaking?
For a small, isolated leak, a compatible patching material or sealant made for your roof membrane can stop water temporarily. Clean the area, let it dry, and apply the patch over the crack or failed seam. These fixes are short-term. If the leak keeps returning, the membrane or flashing likely needs a durable repair or replacement, and a professional inspection will tell you which.
How do you find the source of a flat roof leak?
Start inside: note where the stain is and trace upward to the roof area above it. On the roof, check low spots, seams, flashing, and penetrations first, since these fail most often. A moisture meter or a controlled water test can confirm the entry point. Because water travels, the leak source is often several feet from the interior stain, so inspect the whole drainage path.
When should a leaking flat roof be repaired by a professional?
Call a professional when the leak returns after a patch, when water is ponding, when the membrane is blistered or split across a wide area, or when you cannot safely access the roof. Also call if you see sagging, soft spots, or ceiling damage, since these point to hidden moisture. A certified installer can confirm whether a targeted repair or a full replacement is the better long-term fix.
Flat roof leaks rarely fix themselves, and the longer water sits, the more damage it does to insulation, decking, and ceilings. If you’re tired of repeat patches and want a solution built to last, United Roofing of Colorado can help. Our certified Duro-Last installers provide high-quality materials, prompt service, and convenient scheduling for residential and commercial roofs. Get started with United Roofing of Colorado and request your free roofing estimate today.